Swagger Notes
Table of Contents
1. Creating a new Swagger API Project
1.1. Create the project
-
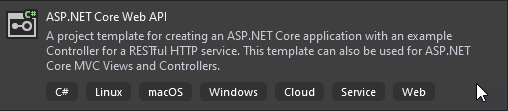
Create a new project via the following template:
-
In the project’s
Startup.csfile, look for theConfiguremethod. Within that method there is an if statement similar to the following which will require a modification:if (env.IsDevelopment()) { app.UseDeveloperExceptionPage(); app.UseSwagger(); app.UseSwaggerUI(c => c.SwaggerEndpoint("/swagger/v1/swagger.json", "Com.SIS.Api v1")); }
1.2. Fix Swagger Endpoint
-
Move the
app.UseSwagger()andapp.UseSwaggerUI(…)commands outside of the if statement so that you have the following:if (env.IsDevelopment()) { app.UseDeveloperExceptionPage(); } app.UseSwagger(); app.UseSwaggerUI(c => c.SwaggerEndpoint("/swagger/v1/swagger.json", "Com.SIS.Api v1"));
1.3. Setup Support Contact info and Enable Documentation
-
In the project’s
Startup.csfile, look for theConfigureServicesmethod. -
Find the
services.AddSwaggerGenproperty assignment.services.AddSwaggerGen(c => { c.SwaggerDoc("v1", new OpenApiInfo { Title = "XS Services", Version = "v1", Description = "Xackley ASP.NET Core Web API", Contact = new OpenApiContact { Email = "someone@gmail.com", Name = "Me" } }); // Set the comments path for the Swagger JSON and UI. var xmlFile = $"{Assembly.GetExecutingAssembly().GetName().Name}.xml"; var xmlPath = Path.Combine(AppContext.BaseDirectory, xmlFile); c.IncludeXmlComments(xmlPath); }); -
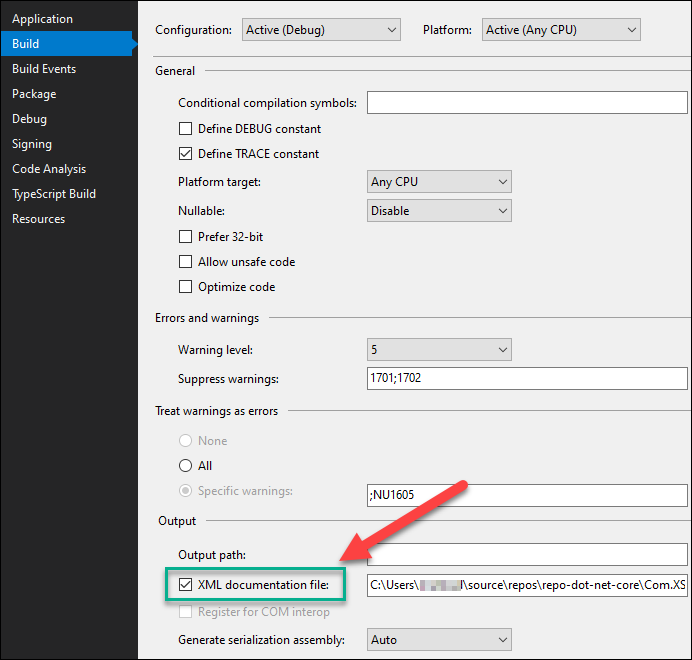
In the project’s settings confirm the following is checked: