VirtualBox Notes
1. Install
-
First stop any existing running instance:
sudo systemctl stop virtualbox.service -
Get VirtualBox
echo "deb [arch=amd64 signed-by=/usr/share/keyrings/oracle-virtualbox-2016.gpg] https://download.virtualbox.org/virtualbox/debian jammy contrib" |
sudo tee /etc/apt/sources.list.d/vbox.list
wget -O- https://www.virtualbox.org/download/oracle_vbox_2016.asc | sudo gpg --yes --output /usr/share/keyrings/oracle-virtualbox-2016.gpg --dearmorsudo apt-get update -
Install VirtualBox
sudo apt-get install virtualbox-7.0 -y

3. Create Windows 11 VM
3.2. Install Windows 11
-
Start up the VM.
-
Select the Windows 11
.isofile. -
Begin the install process.
-
Continue the install until reaching this screen:
This PC can’t run Windows 11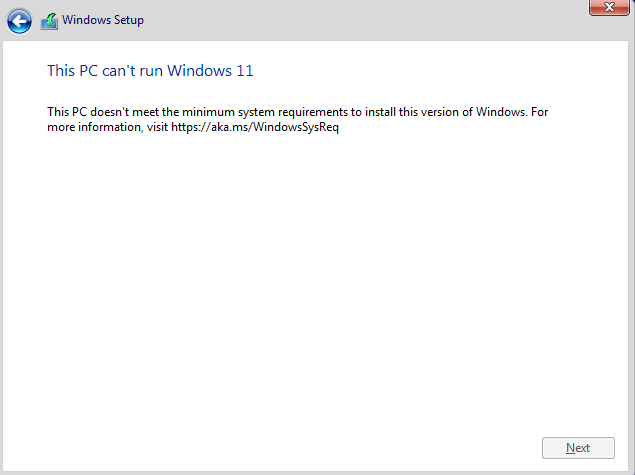
-
At this point we need to stop the install and create new registry entries.
-
Click the red X button in the upper right-hand corner.
-
Choose the
VirtualBoxmenu option -
From the
Soft Keyboard, select Shift+F10 to open a cmd prompt window. -
Now close the
Soft Keyboard -
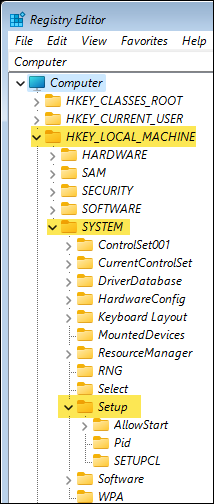
From the cmd prompt window, run the regedit command.
-
Navigate to the key:
-
Right-mouse click on the
Setupkey and select to create a new key named LabConfig -
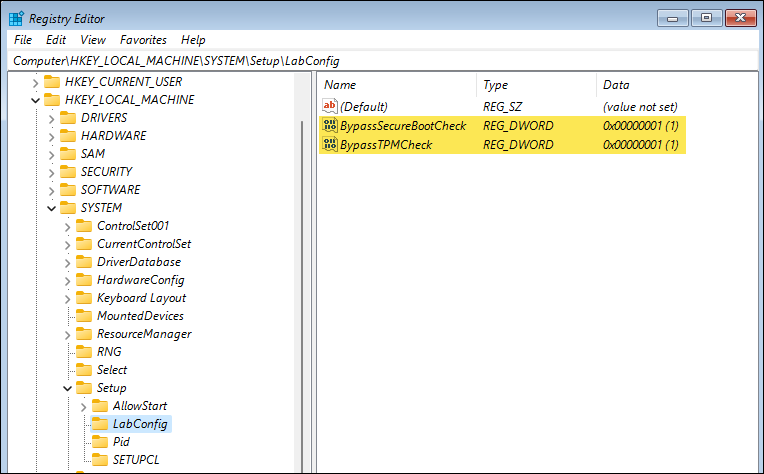
Create two new keys:
-
Right-mouse click on the
LabConfigkey and select and create a key named BypassSecureBootCheck and set the value to 1. -
Right-mouse click on the
LabConfigkey and select and create a key named BypassTPMCheck and set the value to 1. -
These are the two new keys:
-
-
Close the
Registry EditorWindow. -
Close the cmd window.
-
Click the Install now button to restart the install process.
The install process should get past the previous point where we saw,This PC can’t run Windows 11.